How to Bottle Condition Beer Without Guesswork
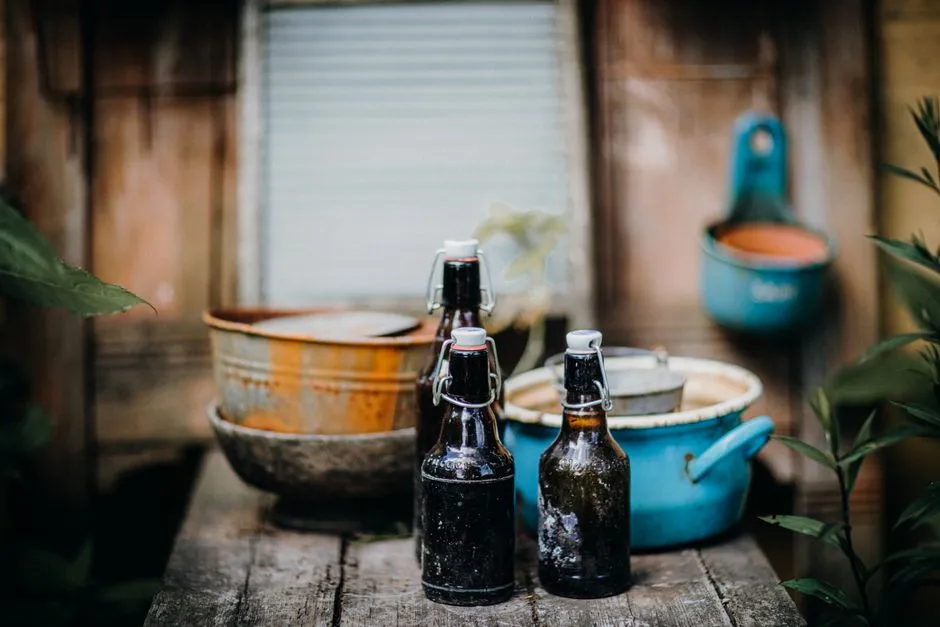
- Bottle conditioning is measured fermentation under pressure
- Do not bottle until gravity is stable
- Clean and sanitize every packaging contact
- Use only bottles designed for the pressure
- Measure the volume that will actually be bottled
- Choose a carbonation target the bottle can handle
- Weigh the correct sugar
- Prepare and distribute the sugar evenly
- Fill consistently and leave intended headspace
- Condition inside secondary containment
- Chill and open one test bottle safely
- Treat suspected overpressure as a glass hazard
- Serve with the same attention used to package
- The final checklist should feel almost boring
Bottle conditioning is measured fermentation under pressure
To bottle condition beer safely, confirm fermentation is complete with stable gravity readings, measure the actual packaged volume and beer temperature, calculate priming sugar for that volume, sugar type, and carbonation target, then fill only clean, sanitized, pressure-rated beer bottles. Distribute the measured sugar evenly without splashing, cap securely, contain the bottles while they condition, and chill one test bottle fully before opening it cautiously.
The yeast ferments the added sugar in the sealed bottle, producing carbon dioxide that dissolves into the beer. Too little fermentable sugar can leave beer flat. Too much sugar—or beer bottled before fermentation finishes—can create dangerous pressure. This is not the stage for measuring with “about a mug” and the confidence of a pirate pharmacist.
Do not bottle until gravity is stable
Airlock bubbles cannot prove fermentation is complete. A leaking lid can stop bubbles while fermentation continues; changing air temperature can produce bubbles after it has stopped. Appearance, taste, calendar days, and a quiet yeast layer are clues, not completion tests.
Use a sanitized hydrometer or another validated method to take gravity readings. Look for stable readings over an interval appropriate to the recipe and yeast, and compare the result with the expected final gravity. Record beer temperature and correct the reading if the instrument procedure requires it.
If gravity continues to fall, wait. If it is stable but unexpectedly high, investigate before packaging. Possible causes include measurement error, incomplete fermentation, poor yeast health, insufficient temperature control, or a recipe with less fermentable wort. Do not solve uncertainty by adding the normal priming dose and hoping the yeast signs a ceasefire.
Fermentable additions made late in the process—fruit, juice, honey, sugar, or certain flavorings—can restart fermentation. Allow that fermentation to complete and verify stable gravity again. Some microorganisms can slowly ferment carbohydrates brewing yeast left behind, which is one reason contamination can create delayed overcarbonation.
Clean and sanitize every packaging contact
Follow the complete homebrew cleaning and sanitation process before sugar touches beer. The bottling bucket, spigot, gasket, siphon, tubing, spoon, filler, bottles, caps, and any funnel or transfer fitting must be visibly clean and sanitized according to the product label.
Disassemble the bucket spigot and filler as their manufacturers direct. Residue hides behind seals and inside spring-loaded tips. Replace scratched tubing, cracked buckets, brittle gaskets, or parts that retain odor after proper cleaning.
Keep sanitized equipment protected. Do not place the bottling wand on a counter, touch the inside of a bottle neck, or scoop up a dropped cap and declare a five-second fermentation exemption. Reclean and resanitize anything that becomes contaminated.
Use only bottles designed for the pressure
Inspect every bottle in bright light. Use sound bottles made for bottle-conditioned beer and compatible with your closure. Reject any bottle that is chipped, cracked, deeply scratched, unusually thin, previously damaged, or of unknown pressure rating. Do not assume a decorative swing-top, growler, wine bottle, food jar, or ordinary glass beverage bottle can hold carbonation.
Many standard pry-off beer bottles can be recapped when they are undamaged and intended for the target pressure. Twist-off bottles often do not seal reliably with common homebrew crown caps and cappers. Champagne or highly carbonated styles need suitable higher-pressure bottles and compatible closures; standard beer bottles are not upgraded by positive feedback.
Wear closed shoes and eye protection during bottling. Keep children and pets out of the area. Glass under pressure deserves the same respect before it contains beer as after.
Measure the volume that will actually be bottled
Priming calculations use packaged beer volume, not the original batch size printed on the recipe. Wort lost to trub, dry hops, samples, transfers, and spills will reduce the amount reaching the bottling bucket.
Calibrate volume marks on the bucket with measured water before brew day, or use another reliable method. Do not read a broad molded line from across the room. If 5 gallons entered the fermenter and only 4.3 gallons will be bottled, calculating sugar for 5 gallons would overdose the batch by about 16.3%, because 5 ÷ 4.3 equals approximately 1.163.
Also account for beer left below the bottling spigot or in transfer equipment. Record the volume after transfer when practical and before the sugar dose is finalized. Small-batch brewers have less room for casual rounding because the same spoon error represents a larger percentage of the total.
Choose a carbonation target the bottle can handle
Carbonation is commonly described in volumes of carbon dioxide. Different styles and serving traditions use different ranges, while bottle, closure, and filling equipment limits can be lower than an ambitious recipe target.
Use a current, reputable priming calculator or a fully specified recipe. Enter:
- Actual beer volume to be packaged.
- Highest relevant beer temperature after fermentation, as the calculator defines it.
- Desired carbonation level.
- Exact priming sugar type.
- Any carbonation already present or method-specific assumptions requested.
Then confirm the result is compatible with the bottle and closure manufacturer's pressure guidance. Do not select a high target because foam photographs look festive. Carbon dioxide is excellent at bubbles and indifferent to your security deposit.
Weigh the correct sugar
Use a scale with suitable resolution and capacity. Place the empty container on it, tare to zero, then add the calculated mass. Verify the unit—grams and ounces are not interchangeable—and write the target down before pouring.
Different sugars have different compositions and fermentability. Corn sugar, table sugar, dry malt extract, honey, and commercial carbonation drops cannot be exchanged mass-for-mass without recalculation. If you change the sugar type, return to the calculator.
Volume measures are less repeatable because crystals settle and scoop density varies. Even published cup measures can become hazardous when copied to a different batch size or sugar. Weighing does not make a wrong calculation right, but it prevents the measuring cup from adding its own subplot.
Do not estimate residual fermentable extract and bottle an actively fermenting beer unless you are following a validated advanced process with suitable pressure controls and expert understanding. The ordinary and safer homebrew route is complete fermentation followed by a calculated priming addition.
Prepare and distribute the sugar evenly
Follow the validated recipe or calculator instructions for preparing the priming solution. A common process dissolves the weighed sugar in a measured amount of water, heats it as directed, cools or handles it safely, and adds it to a sanitized bottling bucket before or during transfer. Exact water volume and heat treatment should come from the chosen method, not be improvised here.
Hot sugar solution can burn. Use a stable heat-safe vessel, control splashing, and keep it away from children, pets, and the edge of the counter. Do not pour very hot liquid into a plastic or glass vessel unless it is rated for that temperature.
Transfer beer gently so it mixes with the solution in a smooth swirl without splashing. Avoid introducing oxygen, which accelerates staling. If the process calls for stirring, use a sanitized spoon and slow movement that reaches the full bucket without whipping air into the beer.
Uneven distribution can produce a mixed case of flat bottles and gushers. Adding variable spoonfuls of loose sugar to individual bottles magnifies measurement and sanitation errors unless using purpose-made, correctly dosed products and a validated method.
Fill consistently and leave intended headspace
Attach sanitized food-grade tubing and a sanitized bottle filler. Fill according to the filler instructions; many spring-tip fillers displace beer and leave a repeatable headspace when withdrawn. Do not invent a larger or smaller gap to “help” carbonation without evidence from the method.
Keep the filler tip below the beer surface to reduce splashing. Stop flow between bottles with the tool, not by pinching questionable tubing with unsanitized fingers. Wipe spills from the outside of bottles before storage, but do not wipe sanitized bottle mouths with a household towel.
Cap each bottle promptly using compatible new closures and a capper suited to the bottle. Inspect that crowns are level and fully crimped without cracked glass. Swing-top gaskets must be food-safe, undamaged, correctly sized, and approved for reuse by the manufacturer.
Condition inside secondary containment
Place bottles upright in a sturdy, lidded plastic tote, closed case, or other containment that can reduce flying fragments and spills while following container ventilation and safety requirements. Do not seal bottles inside an airtight outer vessel that is not designed for pressure. Keep the area away from heat, direct sun, people, pets, and valuable belongings.
Condition within the yeast or recipe's recommended temperature range. Too cool may slow carbonation; too warm may accelerate yeast activity, staling, or pressure development. Measure the storage temperature instead of trusting the season.
There is no universal conditioning time. Many standard beers carbonate over several weeks, but strong beer, old yeast, cold storage, or particular strains can take longer. Time does not repair a bad sugar calculation or unfinished fermentation.
Inspect containment without handling bottles unnecessarily. A leaking bottle, raised cap, broken glass, or unexplained wetness is a warning. Keep others away and seek experienced local guidance before moving anything.
Chill and open one test bottle safely
Once the expected conditioning period has passed, chill one bottle fully and keep it cold long enough for carbon dioxide to dissolve and sediment to settle. Wear eye protection, point the bottle away from faces and breakable objects, and open it over a sink or outdoors in a controlled area. Do not lean over the cap.
A normal release and properly carbonated pour suggest the batch is progressing. Low carbonation may need more time at the correct conditioning temperature. Do not add more sugar to finished bottles or open and recap the batch casually; diagnose temperature, seal, yeast, and calculation first.
Gushing can result from overpriming, incomplete fermentation, infection, disturbed sediment, warm beer, nucleation from residue, or a highly carbonated target. One gusher does not identify the cause. Keep the rest cold and contained while reviewing records.
Treat suspected overpressure as a glass hazard
If bottles break, leak, gush violently, show pushed caps, or may have received excess sugar, do not shake them, carry them around the house, test caps by hand, or peer through the tote. Isolate the area and keep people and pets away.
Handling method depends on bottle type, condition, pressure, temperature, and available protection. Seek guidance from an experienced local homebrew club, retailer, or other qualified person. If handling is unavoidable, use suitable eye and face protection, heavy gloves, long sleeves, long trousers, and closed protective footwear, with barriers between you and the glass. Never assume chilling removes all risk.
Do not taste beer from a cracked, leaking, contaminated, or unknown-pressure bottle. Dispose of beer and glass according to local safety rules. A lost batch is disappointing; an eye injury is not an acceptable attempt to save it.
Serve with the same attention used to package
Chill bottles upright so sediment compacts at the bottom. Pour steadily into a clean glass, leaving the final sediment behind if a clearer pour is desired. Yeast sediment is normal in many bottle-conditioned beers, though unexpected rope, mold, severe gush, or offensive contamination signs are not.
The intended beer still matters: ale and lager cover broad fermentation families, while pale ale and IPA differ in hop balance and average strength. Check the actual ABV and serving volume. Alcohol impairs judgment regardless of how carefully its priming sugar was weighed; never drive after drinking.
Home beer production and sharing rules vary by country, state, and locality. Verify current official law before brewing, transporting, serving, or entering a competition. Home distilling beverage alcohol is a separate activity and can be illegal without authorization; bottle conditioning beer is not a back door to it.
The final checklist should feel almost boring
Before capping, confirm stable gravity, actual volume, exact sugar type and mass, a validated carbonation target, pressure-rated undamaged bottles, complete sanitation, gentle mixing, consistent fill, sound closures, labeled containment, and a safe opening plan.
That is a lot of checking for one satisfying psst. Good. The quietest packaging day is usually the one where every number has a unit, every bottle has a known job, and the carbon dioxide stays exactly where it was invited.